How to create your own invitations, place cards and menus in your photo-editing or word-processing program.
By Heather Camlot
You’re busy with menu-planning, shopping, cooking, and everything else that goes into throwing an “oh, it was nothing” holiday get-together. Who has time for homemade invitations, never mind the burden of menus and place cards?
The thing is, creating your own invites is easy to do, adds your own personal stamp to the event and best of all, can be stress-relieving fun – if you know what you’re doing.
That’s where we come in. Follow our steps to creating invitations, menus and place cards that will impress your guests so much they’ll never notice the overcooked chicken (well, we can only hope).
Step 1: the design
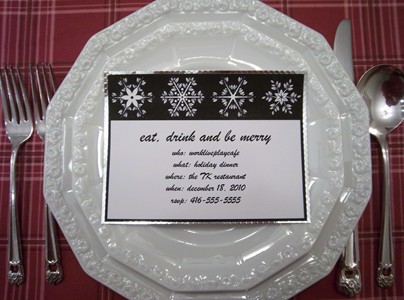
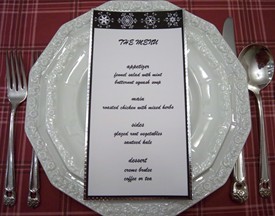
Choose a graphic or image that works with your theme or colour scheme. We found this snowflake design by Robert Proska by searching the term “Christmas” at stock.xchng, a free stock photo site. Microsoft Office is another good bet for free clip art, or you can choose one of your own photographs or kid’s drawings.
Download the image as per the site’s instructions and save it in a documents folder. (If using a non-digital personal creation, scan it into your computer and save it in a documents folder.)
Step 2: the templates
Open your photo-editing program. For the invitation, create a document 4 inches by 5.25 inches (landscape or portrait depends on your image). For the menu, create a document 4 inches wide by 8 inches long and for the place card, 3.5 inches wide by 3 inches high.
For a word-processing program like Word, insert tables for the above measurements and be sure to reduce the cell margins to 0. For both options, you’ll be able to fit 4 invitations per page, 2 menus per page and 9 place cards per page.
Step 3: the assembly
Insert your image into the invitation, decide where you’d like to place it (along the top, bottom, sides, or over the whole invitation) and size it accordingly by pulling on the corners. In your photo-editing program, insert a text box, then type in the information for your gathering. Play with font, size, colour and alignment.
In your word-processing document, there’s no need for a text box, just hit enter and type.
Repeat these steps for the menu and place cards.
Step 4: the print job
Always test-print on regular paper to make sure the measurements work out well and the card looks the way you’d hoped. If not, go back, adjust and test-print again. When satisfied, “flatten” the image in your photo-editing program so it becomes one layer, change the size of the document to 8.5 inches by 11 inches, and set the flattened image to one corner. Copy the image three times and paste in the same document so you have the invite four times on one page.
In a word-processing program, highlight the completed card, copy it and paste it in the other table boxes so you have four on one page.
Insert your good paper or cardstock in the printer, set the printer to high or best, and print. Cut out the cards.
Repeat with the menus and place cards.
Step 5: the embellishments (optional)
You can leave your invitations, place cards and menus as they are or you can embellish the old-fashioned way! With scissors in hand, we cut up a used gift bag just slightly wider than our cards and glued the pieces to the backs for added shimmer and shine. Other ideas include glitter, ribbon, buttons, stitching, embossing powder, vellum…the list is only limited by your imagination.
Have fun and have a happy holiday.
First published November 10, 2010 on WorkLivePlayCafe.com.
