Looking to impress your guests and cut costs? Throw a digital crafting party to create favours, thank-you cards, seating charts, centerpieces and programs.
By Heather Camlot
You’ve been planning your wedding day for almost a year now and the big things – the date, the venue, the guest list, the flowers, the dresses, the invitations – are all taken care of. Phew!
Now, with only a couple of months to go, it’s time to start tackling the smaller to-dos, like favours, place cards and thanks-yous. You want them to impress, you want them be personal, and you want them to be inexpensive. By crafting them yourself you can achieve all three.
Don’t be nervous, it’s not as difficult as you think. I speak from experience. And with the technology available today, you’d have to try very hard to muck things up. So let’s get started!
Seating chart, place cards and menu
After a long night of trying to figure out how not to sit Aunt Irma near Grandpa Joe, jumping into these three DIY projects may be just the stress relief you need. Follow the instructions from our article on creating holiday place cards and menus, but skip the invitations and repeat the steps for the menu to prepare the seating chart. Be sure to match colour, font and design elements such as borders or illustrations to your wedding theme.
Illuminating table number centerpiece
Guests will be fighting to see who gets to take the centerpiece home. Buy one inexpensive cylindrical glass vase for each table, making sure the circumference and height are no bigger than 7.5 inches by 10 inches (the narrowest margins Word will allow). Save and then play with our template or open a new Word document and set the margins to the dimensions of your vase and select the appropriate Orientation (Landscape or Portrait). Under Page Color, pick a shade to fill the entire background. Type in the number 1 and enlarge it dramatically – not so much that it wraps around the entire vase, but make it large enough to be seen from a distance. Centre the number and turn it white. If you used a border in the previous projects, add one along the top and bottom here as well, making sure to turn it white. Or add shapes (Insert > Shapes) here and there, being sure to select the No Outline option (Drawing Tools > Shape Outline > No Outline). Print onto transparency paper for inkjet printers, cut to size, wrap around vase and affix with double-sided tape. Insert a pillar candle and repeat with the next table number.
The program
It’s common not to know some of the people in the wedding party, but when you don’t know the customs of the couple, a wedding can feel like a test of patience, rather than an inclusive affair. A program is a lovely introduction to those traditions and to the wedding party, as well as a nice memento.
Save and then play with our template or open a new Word document, select Landscape under Orientation and set the Columns to three. On the first column, type in any dedications or thank yous. Skip the second column. On the last column, add the name of the bride and groom, the date and the location. On the first column of the next page, include the names of the wedding party. On the next two columns include the ceremony events. Format the font type, size and colour, and repeat any design elements used for the projects above (borders, shapes, etc). Test-print on regular paper, making sure of the direction of the paper feed so that the program pages all face the same way. Then print at high or best on quality paper of your choosing. Fold the program in thirds with the couple’s name as the cover and wrap a ribbon or add a sticker to hold closed.
The favour
At the wedding of one of my oldest friends, the couple handed out a CD with a dozen or so songs that held special meaning to them. While some of the tunes may not have been everyone’s cup of tea (I’m sure some guests are still scratching their heads as to why the Spiderman theme song was on there), a CD is practical and long-lasting. I still listen to my copy.
For detailed instructions on how to upload your songs to iTunes or Windows Media Player, click here. (For this situation, select File > Burn Playlist to Disc for iTunes or Burn > Audio CD for WMP). To up the wow factor of your CDs, order the CD Packaging Kit from Chronicle Books. With illustrations by Ayako Akazawa, the kit comes with 25 CD labels in five repeating designs, 25 CD sleeves and dozens of stickers to seal the sleeves. Gorgeous.
Thank-you cards
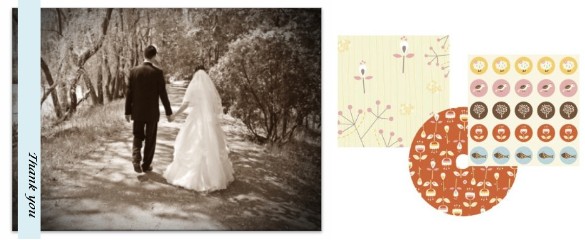
I think it’s safe to say that everyone loves receiving a photo thank you card in the mail. The simplest way to create a photo card is to upload your photos to a photo-printing site, select one of its templates, alter to your liking and then wait for the cards to arrive by mail. Sites that specifically include wedding thank yous include Shutterfly and Dolcetto Designs. You can also make thank you cards on your own. Word offers a variety of templates that you can alter to suit your style. Save and play with our template, which features a basic Avery thank-you tent card to which we added a wedding photo by Aleksandr Kutsayev (FreeDigitalPhotos.Net) and a thank-you message along the left-hand side in a colour and font matching the program and the centerpiece. Don’t forget to add a handwritten note to show just how appreciative you are.
Happy crafting and congratulations!
Wedding couple image: Aleksandr Kutsayev, FreeDigitalPhotos.Net
First published March 21, 2011, on WorkLivePlayCafe.com.
